Pride can be one of the seven deadly sins, but celebrating an accomplishment that took time and effort is good. After attending the
Maker Ed Toronto event in July, I was keen to do more finger knitting and complete a more elaborate project. I declared that I would make a hat.
I first spent time practicing the basics - making chains and infinity scarves.
 |
| Thinking of new uses for my finger knitting lines. Hairband? |
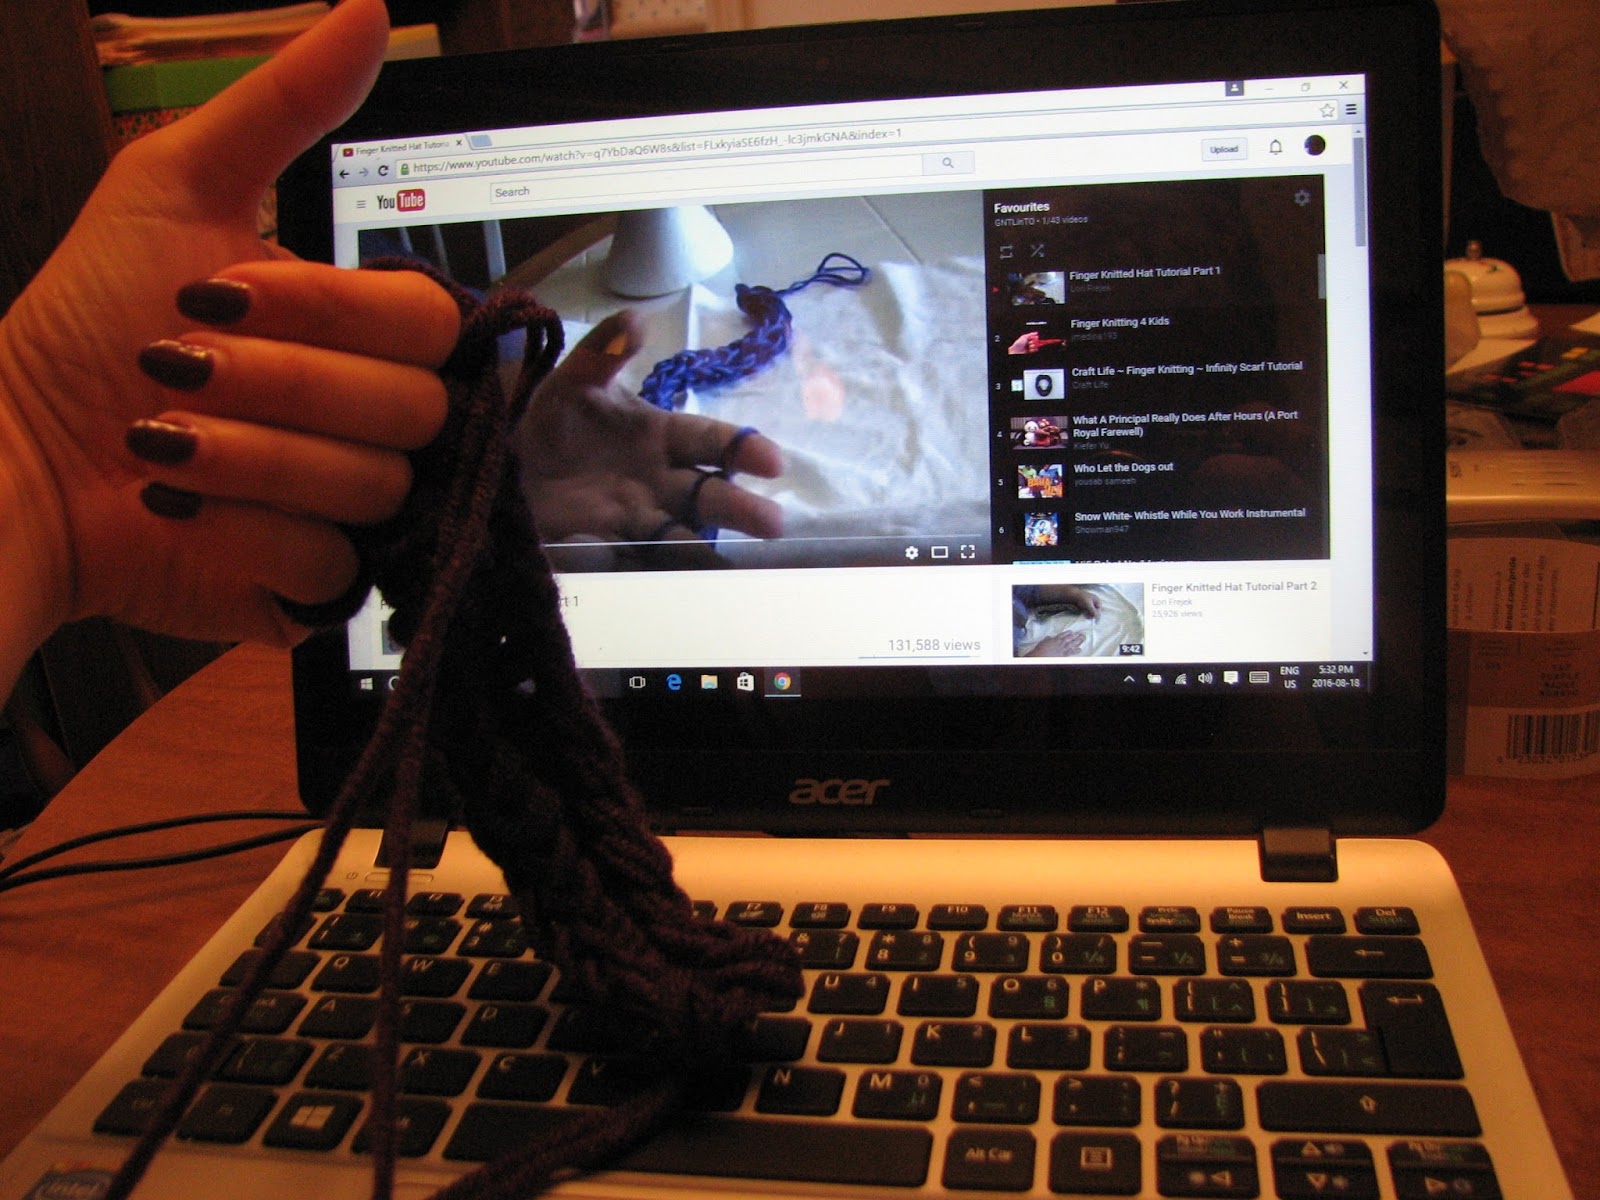
I watched the video that Melanie Mulcaster included as part of her workshop.
I visited craft stores and bought appropriate yarn.
I also took tons of photos to document the process.
 |
| Comparing my progress to the video. |
I postponed starting the actual hat for a while. I wanted to finish my scrapbooking so I could concentrate on this project. Truth be told, I was also nervous. I realize that I can unravel mistakes and that errors were inevitable with my first attempt, but I wanted this to feel like a positive experience so that I'd be inclined to continue this potential new hobby.
 |
| Didn't buy a stitch keeper, but improvised! |
My fingers aren't used to longer projects and, since I was on vacation away from home while attempting this project, sometimes I would have to leave my work to attend to other things (like eating at the many, many restaurants we visited). I didn't buy that stitch keeper that Melanie recommended, but I found that extra-large paper clips worked just as well for holding the loops in place until I could return to the task.
 |
| Curving and connecting |
Making the move to connect the line and start to curve was the first challenge. I watched the video several times and was disappointed when the yarn wasn't always completely visible on the screen so I could compare. I searched for the outside stitches and "picked them up". Thankfully, after a few more rows, I could see progress happening before my eyes.
 |
| Mid-knitting (note the pinky finger has extra loops for connecting) |
 |
| Hubby took this "alternate POV" shot of the knitting process. |
 |
| It looks like a circle! |
 |
| It's taller too! |
The video I watched described how to make a "slouchy hat", which was a bit more complex. Since I chose to make a toque, I didn't need to decrease my width. However, both kinds of hats needed a darning needle to close the top. I'm thankful I watched the videos all the way through before I began, because I would have been disappointed to leave it undone. I had to purchase a needle. The video recommended using one particular end to close but since I had a longer piece of yarn on the other side, I chose to use that side instead to close up.
 |
| Me, doing "needlework" of a sort! |
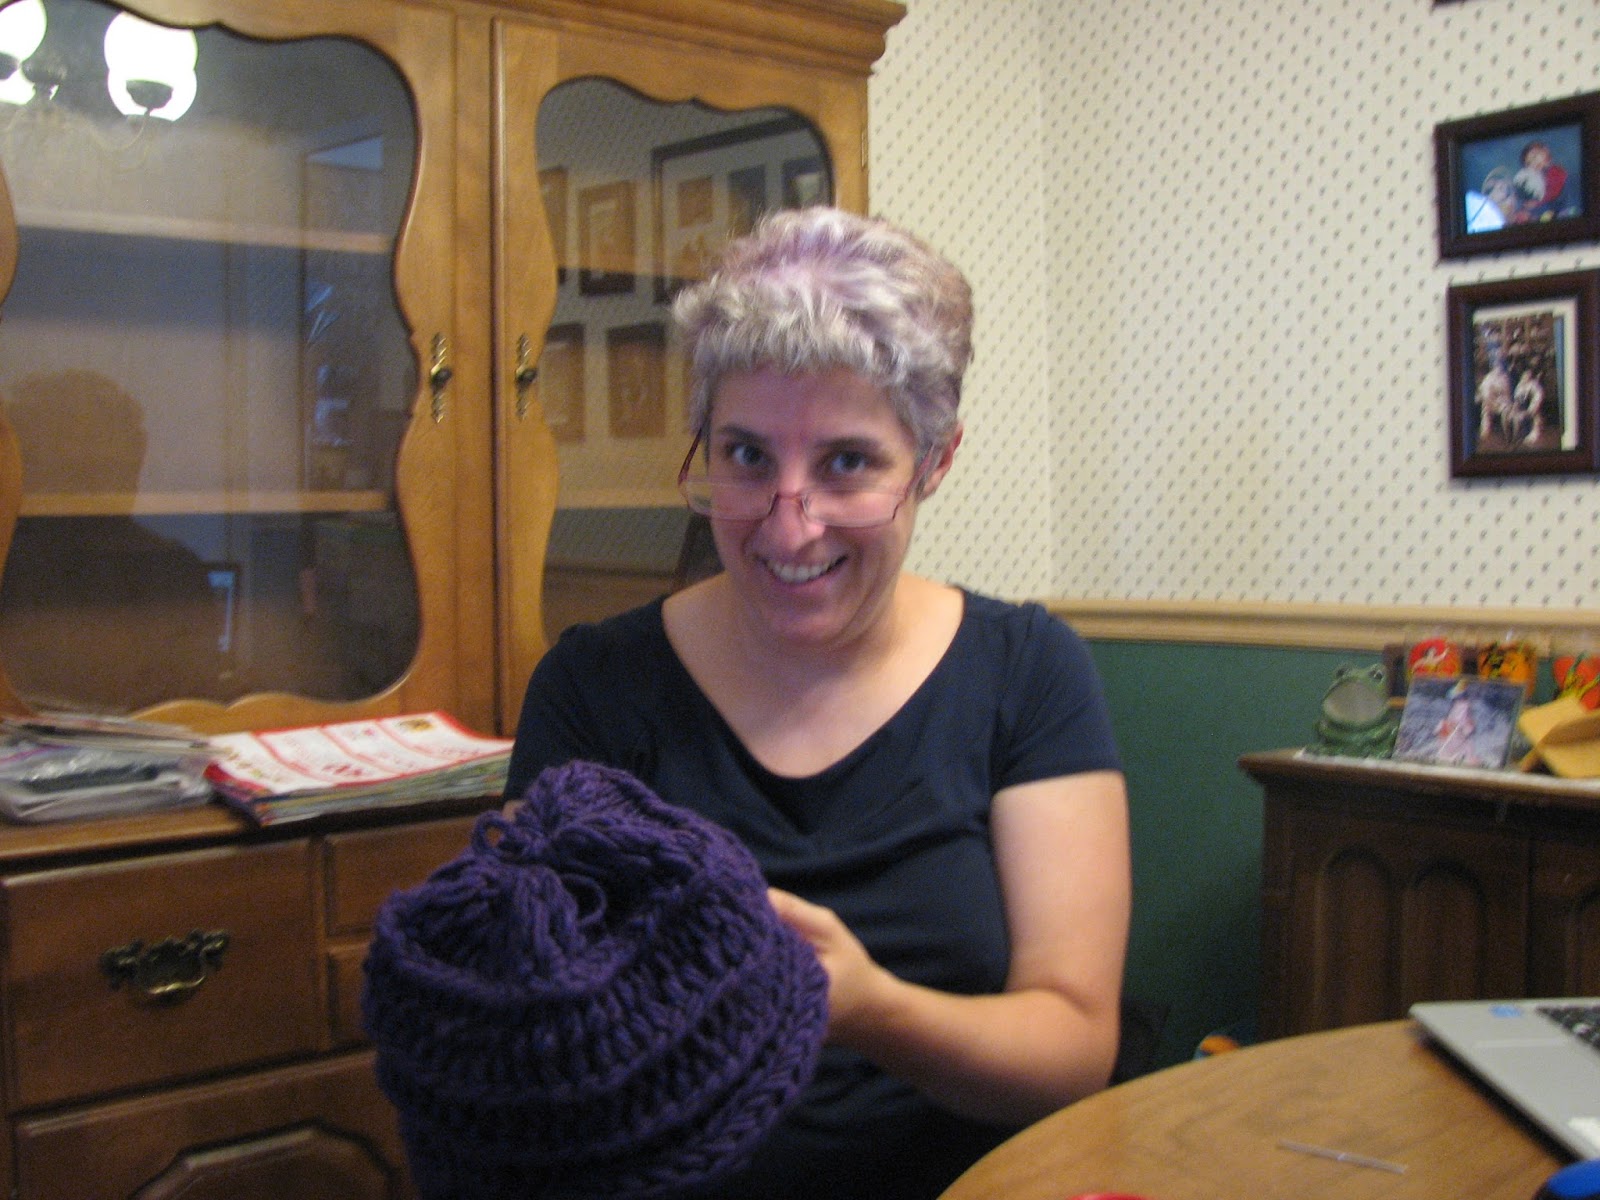
I was so pleased when I finished. I could see where I had made some mistakes - a missed stitch, or a loose section - but I felt like those errors gave the hat "character" and showed that this was my first hat. A funky flower-like top emerged quite by accident.
 |
| Mission accomplished! It even looks like a hat! |
I saw in the video that the hat can be worn inside-out or outside-in. I'm not sure which I prefer!
 |
| Should I wear my hat this way ... |
 |
| or should I wear it this way? |
I was so pleased with my handiwork that I wore the hat in the car while I drove back from Baltimore to Toronto. I took it off before I passed through customs because I thought I might look a bit too quirky wearing a wool cap in August.
So, what are the pedagogical ramifications of this project? I will keep out several kinds of wool in my library makerspace so that students can finger knit when they want. I will also put my hat on display so students can see what's possible to make. (When I first finger knit ever, as part of a class coverage during PLC time, we only had enough time to make a short chain.) I will point out and celebrate the imperfections, because it shows I'm not perfect but learning my craft and it makes the end product unique and all mine. I might make some more hats to give to relatives for Christmas and I'm considering tackling an even bigger finger-knitting project - a blanket!
My knitting success has also given me the courage to start sewing lessons (both with my mother and possibly with the TDSB Continuing Education department). I'll exorcise the ghost of my Grade 7 sewing project (in brief: back when middle school students took Home Economics, I brought my half-completed pink and purple shorts home at the end of the course; my mother, who worked for years as a seamstress with the Singer Sewing Company, took one look at my twin circles of fabric filled with pins, took it away, and three minutes later came back with a finished, polished pair of wearable shorts.) That experience taught me a bad lesson - that I should leave all sewing tasks to the expert, aka my mother. I'm going to unlearn that message and become more independent. School no longer offers cooking or sewing classes, so I hope to share in the near future how my sewing adventure personally and in the library makerspace will go.
P.S. Big thanks to Melanie Mulcaster (@the_mulc) and Jennifer Brown (@JennMacBrown) for being a virtual support group with my finger knitting endeavors. I plan on attending one of Jennifer's future knitting circle gatherings and Melanie's tutoring has been valuable. Knowing these two were interested in what I was doing with yarn encouraged me to try.


Love the journey :) I also wore my last hat at the cottage in 32 degrees. ...because we are PROUD! :) Just tweeted you my reflection from TeachOntario. May we have many more adventures ahead. (and wear our hats at OLA SuperConference! ooohhh I can't wait!!)
ReplyDeleteI found the arm of my reading glasses also worked quite well to hold my stitches :)
ReplyDelete